很多语言都提供了上下文,比如java(android)、PHP等等,go也不例外,今天讲解下Context的使用场景及其实现原理。
基础用法
go 1.7之后,引入的新概念。
go在系统级别就实现了,最常用的有两种场景,一是就是超时设置,比如http请求、图片处理等等,二是向下传递信号,传值处理。当然咯,上下文和并发是有着密切联系的。
context.Context 的主要作用还是在多个 Goroutine 组成的树中同步取消信号以减少对资源的消耗和占用,对整个goroutine的生命周期的控制,虽然有着传值的功能,但是还需要慎用。
超时使用
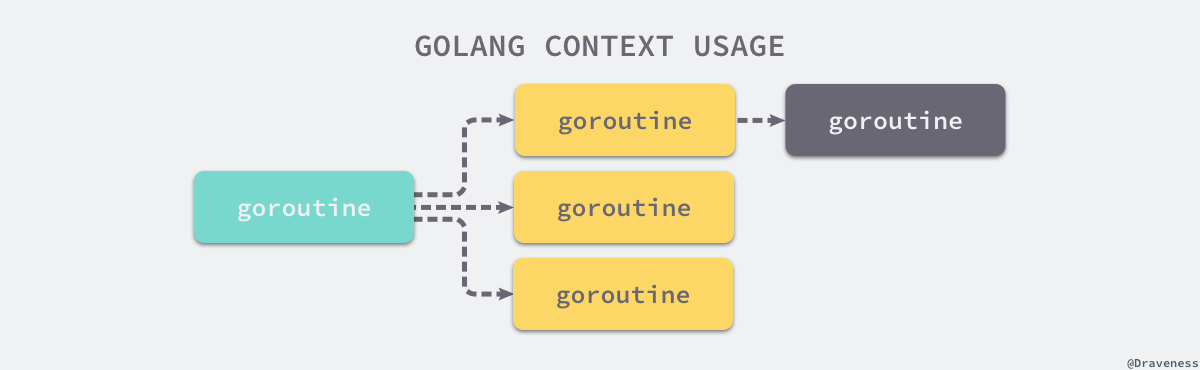
如上图:
最上层的节点,比如发起网络请求的节点,向下不管是函数的调用,还是协程嵌套协程的调用,或者是协程调用函数等等,无论后面是如何处理。一旦最上层超时了,所有正确的处理了长下文传递,则所有函数都应该超时。这就实现了,上层对于下层的管控,不然上层都结束了,下层还在工作,浪费性能。然我们最上层就是 background() 节点。
举例说明
在1.6之前,我们想在主线程同时停止所有开启的子线程,只能通过select+channel来接收,如:
func job(stop chan bool, index int) {
        for {
                select {
                case <-stop:
                        fmt.Println(index, " handle stop channel")
                        return
                default:
                        fmt.Println(index, " : still ")
                        time.Sleep(time.Second)
                }
        }
}

func main(){
        stop := make(chan bool)
        go job(stop, 1)
        time.Sleep(2 * time.Second)
        fmt.Println("stop the goroutine")
        stop <- true
        time.Sleep(5 * time.Second)
    }
但这样有个问题,如果我子线程中又开启了子线程,或者同时开启n个子线程,这样需要每个子线程都需要通过channel来停止。
在1.7之后,就可以通过context ,如下:
func main() {
        ctx, cancel := context.WithCancel(context.Background()) // 手动调用cancel()来手动控制
        //ctx, cancel := context.WithTimeout(context.Background(), 5*time.Second) // 自动设定超时时间

        go jobContext(ctx, 1)
        go jobContext(ctx, 2)

        time.Sleep(5 * time.Second)
        //defer cancel()
        cancel()
        time.Sleep(2 * time.Second)

}

func jobContext(ctx context.Context, index int) {
        for {
                select {
                case <-ctx.Done():
                        fmt.Println("stop channel index:", index)
                        return
                default:
                        fmt.Println("still working index:", index)
                        time.Sleep(time.Second)
                }
        }

}
当我们调用cancel()的时候,所有的子线程都会立即完成。
传值使用
在我们上层对于下层调用的时候,进程需要传递参数,如果参数多了传递起来极为不便,Context正好通过 context.WithValue 能从父上下文中创建一个子上下文,传值的子上下文使用 context.valueCtx接收。 但是 使用 context.Context 传递请求的所有参数一种非常差的设计,因为对于代码可读性来说是不强的,而且对于Context来说也是一种负担。,比较常见的使用场景是传递请求对应用户的认证令牌以及用于进行分布式追踪的请求 ID。
举例说明
func worker2() {
    ctx := context.WithValue(context.Background(), "user_token", "eyJhbGciOiJpXVCJ9.eyJ1c2VyX2lkIjoiNTY2MzR9.6EIq_Ddku-Kvjg")
    handle2(ctx)

}
func handle2(ctx context.Context) {
    if ctx.Value("user_token") != nil {
        fmt.Printf("token is %s\n", ctx.Value("user_token"))
    }
}
源码分析
我们来看看底层源码,究竟如何实现,它如何做到值传递以及可以控制下层并发的终止。
数据结构
type Context interface {
    Deadline() (deadline time.Time, ok bool)
    Done() <-chan struct{}
    Err() error
    Value(key any) any
}
- Deadline():既然是控制整个生命周期,那生命周期就是开始和终结,也就是如果你设置了deadline,则会返回终止的信号,通过deadline控制。返回ctx的过期时间。并非所有context都有过期时间。
- Done():返回一直只读的chan,按照我们上述的例子也知道,我们可以从channel中接收当前context终止的信号。它既然是struct{}类型,就明摆着告诉你,这个就是通知,并非是数据通信、交互的使用。
- Err():和Done从某种程度来说,是类似的功能,我们上面例子也提到了,如果Done了,则会有Err的产生,err就是
context deadline exceeded。当然err还会有很多种类型,比如过期、被手动取消等等。和Done的区别是,err是一种同步的感知方式,让你知道本次context结束。done是channel通信的方式。 - Value(key any) : 就是我们上述例子的值传递的实现方法,它类似一个map的实现逻辑,返回context中对应的key、value的值。
所以,如果我们自己实现了context方法,也就实现了一个自定义的context类。
emptyCtx
空的Ctx,我们使用 context.Background()的时候,底层就是创建了一个emptyCtx。
func Background() Context {
    return backgroundCtx{}
}

type backgroundCtx struct{ emptyCtx }

type emptyCtx struct{}

// 返回deadline为nil,是一个公元元年的初始化,以及ok为false,表示当前context不存在过期时间
func (emptyCtx) Deadline() (deadline time.Time, ok bool) {
    return
}

// 返回一个nil,用户无论往里面写入或者读取,都会陷入阻塞,会死锁。
func (emptyCtx) Done() <-chan struct{} {
    return nil
}

// 返回的错误永远为nil
func (emptyCtx) Err() error {
    return nil
}

// 同样 返回的value永远为nil
func (emptyCtx) Value(key any) any {
    return nil
}
少即是多,这也就是所有的最上层的就是一个空白的架子,后面我们所有的东西都是在这个架子上面去叠加,去丰富。
包括我们调用context.TODO(),也是一个emptyCtx。
cancelCtx
在多线程中,有一句经典:如果你创建的线程、协程,不知道什么时候停止的话,请你停止创建它。 这就是告诉我们,要并发就需要控制他,不能滥用并发。我们如何控制?cancelCtx就可以来控制,其实我们上述例子,就已经通过cancelCtx来控制子协程的生命周期。
我们直接上源码:
// 成员属性
type cancelCtx struct {
    Context

    mu       sync.Mutex            // protects following fields
    done     atomic.Value          // of chan struct{},created lazily, closed by first cancel call
    children map[canceler]struct{} // set to nil by the first cancel call
    err      error                 // set to non-nil by the first cancel call
}

type canceler interface {
    cancel(removeFromParent bool, err, cause error)
    Done() <-chan struct{}
}
- Context 传入的父Context,当前子节点的父节点
- mu 并发操作时候的互斥锁,做并发保护
- done 标识ctx是否结束的一个chan,感知当前声明周期的变化
- children 一个set类型的,就是当前节点下面的子节点,只需要关心子节点的cancel/Done两个方法,其余的能力父节点是不关心的。
- err 当前Context终止,会有一些错误信息出来。
以上是他的成员属性,我们再看看他的四个具体实现方法
Deadline方法
并未实现该方法,应为嵌入了父Context的Deadline能力,如果父Context是空白的话,会返回一个初始的时间和一个false。
Done方法
func (c *cancelCtx) Done() <-chan struct{} {
    d := c.done.Load()
    if d != nil {
        return d.(chan struct{})
    }
    c.mu.Lock()
    defer c.mu.Unlock()
    d = c.done.Load()
    if d == nil {
        d = make(chan struct{})
        c.done.Store(d)
    }
    return d.(chan struct{})
}
我们看到,Done方法里面,主要是要返回一个struct类型的channel,可能有一个并发,会有一个mu.Lock的过程,保证是一个懒加载、保证唯一。
Err方法
func (c *cancelCtx) Err() error {
    c.mu.Lock()
    err := c.err
    c.mu.Unlock()
    return err
}
看上去,也有一个并发读写的诉求,也加了一把锁。
Value方法
func (c *cancelCtx) Value(key any) any {
    if key == &cancelCtxKey {
        return c
    }
    return value(c.Context, key)
}

// &cancelCtxKey is the key that a cancelCtx returns itself for.
var cancelCtxKey int
在cancelCtx下,会全局声明一个cancelCtxKey,如果我们传入的key为特定的key,则直接返回自身的指针。
为什么要做这个判断呢?首先这是不可导出参数,外部不能修改,且这是一个指针,应该是内部在某一个时候被调用。应该是内部的一个协议,约定好了的,看注释也没有详细说明,我们先往下看吧啊。
cancelCtx如何调用?
上面我们分析了源码,那如何调用呢?
其实我们上面也是调用了,就是已通过 context.WithCalcel()来调用的。
func WithCancelCause(parent Context) (ctx Context, cancel CancelCauseFunc) {
    c := withCancel(parent)
    return c, func(cause error) { c.cancel(true, Canceled, cause) }
}

func withCancel(parent Context) *cancelCtx {
    if parent == nil {
        panic("cannot create context from nil parent")
    }
    c := &cancelCtx{}
    c.propagateCancel(parent, c)
    return c
}
- cancelCtx不能自行调用的,一定要有一个父节点,总则就panic了。
- 把父节点 parent和自己构建的初始化对象 cancelCtx{},去构建出一个新的cancelCtx。
- 我们主要看返回 cancel CancelCauseFunc 这个参数,是一个闭包函数,也就是接收到的参数,一旦调用这个参数,里面就执行cancel函数来终止。
这里面重要的是 propagateCancel,我们看看如何通过父节点来取消子节点的,源码以及注释:
// propagateCancel arranges for child to be canceled when parent is.
// It sets the parent context of cancelCtx.
//propagateCancel 方法顾名思义,用以传递父子 context 之间的 cancel 事件
func (c *cancelCtx) propagateCancel(parent Context, child canceler) {
    c.Context = parent

    done := parent.Done()
        // 如果父亲永远不会取消,那没必要传播这个取消的特性了,比如emptyCtx。
    if done == nil {
        return // parent is never canceled
    }

    select {
        // 如果父亲已经取消了,那子节点也必须取消的,提前取消吧。
    case <-done:
        // parent is already canceled
        child.cancel(false, parent.Err(), Cause(parent))
        return
    default:
    }

        // 这里判断我的父节点是不是cancelCtx,如果是的话,把我加到我的父节点的children中去。方便一并取消。
    if p, ok := parentCancelCtx(parent); ok {
        // parent is a *cancelCtx, or derives from one.
        p.mu.Lock()
        if p.err != nil {
            // parent has already been canceled
            child.cancel(false, p.err, p.cause)
        } else {
            if p.children == nil {
                p.children = make(map[canceler]struct{})
            }
            p.children[child] = struct{}{} // cancelCtx里面其实有一个children的map,在这里加进去的,
        }
        p.mu.Unlock()
        return
    }

        // 如果父节点,实现了AfterFunc方法的话,需要把实现的stop方法一起加入我自己的Context中去,通过调用stop方法来停止的。
    if a, ok := parent.(afterFuncer); ok {
        // parent implements an AfterFunc method.
        c.mu.Lock()
        stop := a.AfterFunc(func() {
            child.cancel(false, parent.Err(), Cause(parent))
        })
        c.Context = stopCtx{
            Context: parent,
            stop:    stop,
        }
        c.mu.Unlock()
        return
    }

        // 如果父节点非上述两个类型,且又开启了联动取消的能力的话
        // 我时时刻刻的去监听两个channel,一个是我父节点的生命周期终止,如果读取到了,立马把我下面所有的子节点终止掉
        // 第二个是如果子节点完成生命周期了,那什么都不用干,传播是从上往下的。
    goroutines.Add(1)
    go func() {
        select {
        case <-parent.Done():
            child.cancel(false, parent.Err(), Cause(parent))
        case <-child.Done():
        }
    }()
}
我们刚刚看到了parentCancelCtx 这个,就是判断我的父节点是不是cancelCtx,那里面发生什么事情呢?接着看
func parentCancelCtx(parent Context) (*cancelCtx, bool) {
    done := parent.Done()
    if done == closedchan || done == nil {
        return nil, false
    }
    p, ok := parent.Value(&cancelCtxKey).(*cancelCtx)
    if !ok {
        return nil, false
    }
    pdone, _ := p.done.Load().(chan struct{})
    if pdone != done {
        return nil, false
    }
    return p, true
}
- 如果parent的channel已完成了,则返回false。
- 如果以特定的cancelCtxKey从parent中取值,取得的value是parent本身,则返回true。所以cancelCtxKey是一个约定,特有的协议。在这里使用了。
好了,既然看到这里了,我们看最最重要的,就是如何取消呢?还记得我们注入过一个回参,是一个闭包函数吗?它封装的是cancelCtx.cancel方法,我们看看
// 如果我当前的Context要取消了,要做哪些呢?
func (c *cancelCtx) cancel(removeFromParent bool, err, cause error) {
    if err == nil {
        panic("context: internal error: missing cancel error")
    }
    if cause == nil {
        cause = err
    }
    c.mu.Lock()
    if c.err != nil {
        c.mu.Unlock()
        return // already canceled
    }
    c.err = err // 首先,存一个error进去
    c.cause = cause
    d, _ := c.done.Load().(chan struct{}) // 这里有一个懒加载
    if d == nil {
        c.done.Store(closedchan) // 如果之前没有声明过,直接给一个全局的标识关闭
    } else {
        close(d) // 直接关闭,所以上游读取channel的时候不阻塞,而是读取到一个零值。
    }
        // 自此,两个方式,一个同步,获取是否有err,和一个异步,通知。的方式都已经处理完成了。
        //
    for child := range c.children {
        // NOTE: acquiring the child's lock while holding parent's lock.
                // 这里把所有类型为cancelCtx的子节点,全部取消掉
        child.cancel(false, err, cause)
    }
    c.children = nil
    c.mu.Unlock()

        // 是否要从当前父节点中移除呢?默认是true哈。
    if removeFromParent {
        removeChild(c.Context, c)
    }
}
自此,cancelCtx完结。
timeCtx
我们再来看看,定时的Context,它一定程度上是依附了cancelCtx,结构体源码:
type timerCtx struct {
    cancelCtx
    timer *time.Timer // Under cancelCtx.mu.

    deadline time.Time
}
- 看到没,"继承"了cancelCtx。
- timer 理解为闹钟,触发后,就是终止当前的timerCtx,我们一旦终止了,会往下的传递把子节点全部干掉
- deadline,就是timer的终止时刻。
我们再来看看四个实现的方法吧
Deadline
func (c *timerCtx) Deadline() (deadline time.Time, ok bool) {
    return c.deadline, true
}
可以看出,在timerCtx的话,可以调用Deadline,返回就是你自己设置的Deadline值。
cancel
// 如果手动的调用cancel的话
func (c *timerCtx) cancel(removeFromParent bool, err, cause error) {
    c.cancelCtx.cancel(false, err, cause) // 先把继承的父类,内置的cancel调用下
    if removeFromParent {
        // Remove this timerCtx from its parent cancelCtx's children.
        removeChild(c.cancelCtx.Context, c)
    }
    c.mu.Lock()
    if c.timer != nil {
        c.timer.Stop() // 先把闹钟给停了
        c.timer = nil // 防止内存泄漏
    }
    c.mu.Unlock()
}
- 复用继承的cancelCtx的cancel能力
- 判断是否从parent的children set中移除,
- 加锁
- 停止闹钟
Err和Value方法
timerCtx没有实现,说明调用了父类cancelCtx的能力
创建timerCtx
我们通过context.WithTimeout方法构建一个timerCtx,但是只是做了一层经纪人而已,本质调用WithDeadline方法,而WithDeadline也是经纪人,它只是调用了WithDeadlineCause。
func WithTimeout(parent Context, timeout time.Duration) (Context, CancelFunc) {
    return WithDeadline(parent, time.Now().Add(timeout))
}

func WithDeadline(parent Context, d time.Time) (Context, CancelFunc) {
    return WithDeadlineCause(parent, d, nil)
}

func WithDeadlineCause(parent Context, d time.Time, cause error) (Context, CancelFunc) {
    if parent == nil {
        panic("cannot create context from nil parent")
    }
        // 如果你设定的时间,比当前时刻还早,那定时不成立,立即取消。或者是你的父节点已经过期了,那么你也过期吧。
    if cur, ok := parent.Deadline(); ok && cur.Before(d) {
        // The current deadline is already sooner than the new one.
        return WithCancel(parent)
    }
    c := &timerCtx{
        deadline: d,
    }
    c.cancelCtx.propagateCancel(parent, c)
    dur := time.Until(d)
    if dur <= 0 {
        c.cancel(true, DeadlineExceeded, cause) // deadline has already passed
        return c, func() { c.cancel(false, Canceled, nil) }
    }
    c.mu.Lock()
    defer c.mu.Unlock()
    if c.err == nil {
                // 基于time包创建一个定时器,然后过多久后就调用,且错误信息为DeadlineExceeded的引用
        c.timer = time.AfterFunc(dur, func() {
            c.cancel(true, DeadlineExceeded, cause)
        })
    }
    return c, func() { c.cancel(true, Canceled, nil) }
}
valueCtr
之前我们的案例中也提到过,Context还有一个用法,传递值的作用。
// A valueCtx carries a key-value pair. It implements Value for that key and
// delegates all other calls to the embedded Context.
type valueCtx struct {
    Context
    key, val any
}
可以看出,valueCtx同样继承了一个父Context,但是成员方法却只有key、val。看清楚哦,是一个key、val,并非是一个map存储的。也就是一个valueCtx只包含一组key、val。所以,如果我们在Context中设置多组key、val,那肯定会有多个valueCtx产生,这也就是为什么不要滥用valueCtx的原因。多个数据,你还不如把参数丢到自定义的map中呢。
value()
四个接口方法,value必须是valueCtx的主场了。
func (c *valueCtx) Value(key any) any {
    if c.key == key {
        return c.val
    }
    return value(c.Context, key)
}

func value(c Context, key any) any {
    for {
        switch ctx := c.(type) {
        case *valueCtx:
            if key == ctx.key {
                return ctx.val
            }
            c = ctx.Context
        case *cancelCtx:
            if key == &cancelCtxKey {
                return c
            }
            c = ctx.Context
        case withoutCancelCtx:
            if key == &cancelCtxKey {
                // This implements Cause(ctx) == nil
                // when ctx is created using WithoutCancel.
                return nil
            }
            c = ctx.c
        case *timerCtx:
            if key == &cancelCtxKey {
                return &ctx.cancelCtx
            }
            c = ctx.Context
        case backgroundCtx, todoCtx:
            return nil
        default:
            return c.Value(key)
        }
    }
}
由上:
- 如果当前传入的key,凑巧等于当前Context的key,那直接返回value即可。
- 否则的话,则fox循环中,去判断当前Context的类别,如果是valueCtx的话,且自身没有匹配上key的话,则往上取出他的父Context。
由此可见,再一次声明,不要在Context中去使用超多的value,因为它查询的时候并非如同map是常数级别,差点的,可能是O(N),它需要遍历,类似于链表。
WithValue()
func WithValue(parent Context, key, val any) Context {
    if parent == nil {
        panic("cannot create context from nil parent")
    }
    if key == nil {
        panic("nil key")
    }
    if !reflectlite.TypeOf(key).Comparable() {
        panic("key is not comparable")
    }
    return &valueCtx{parent, key, val}
}
- 如果爹为nil,painc
- 如果key为空,painc
- 如果key的类型不可比较,painc
- 每次都新建一个valueCtx对象
- 如果两次的key都是一样,并非去重,而是重新创建valueCtx。而取值的时候,是不固定的,看你当前的Context是谁。
那留你有啥用?
还真有点用,在并发读写的时候,在某些情况下可以保证这个key、val是当前子协程独有的数据。如果没有针对每个子协程分配子Context,则可能会共享数据。
valueCtx用法小结
- 一个 valueCtx 实例只能存一个 kv 对,因此 n 个 kv 对会嵌套 n 个 valueCtx,造成空间浪费;
- 基于 k 寻找 v 的过程是线性的,时间复杂度 O(N);
- 不支持基于 k 的去重,相同 k 可能重复存在,并基于起点的不同,返回不同的 v. 由此得知,valueContext 的定位类似于请求头,只适合存放少量作用域较大的全局 meta 数据;
- 不合适把业务数据丢进去;